- Guided path
- Beginner
- Playwright (TypeScript)
Your First 30 Days
Part 3 of 3 in Visual AI Foundations · For QA engineers, SDETs, developers, and team leads · Reviewed Nov 5, 2026
A week-by-week path from your first baseline to a visual suite that runs in CI and that your team trusts.
Teams that have just started with Applitools Eyes. This includes leads who own the rollout, not only the people writing tests.
- You've read Why Visual AI Works
- You've read Closing the Visual Gap
- Eyes account and API key
- Playwright suite with at least one key flow
This tutorial will advise you on how to approach the first month of your journey using Applitools Eyes. By the end of day 30, you should come out with a fully functional, automated visual testing suite. This document links to the documentation as well as the previous document in this series, Closing the Visual Gap, which goes in-depth in actual implementation steps. Consider this your guide to what a successful initial implementation of Applitools Eyes looks like.
Here's a brief overview of what each week's goal and end result looks like.
| Week | Goal | You'll Have |
|---|---|---|
| #1: Your First Baselines | Get stable, trustworthy baselines on one key flow. | A functional, working example of one baseline to compare against. |
| #2: Learning to Review | Make reviewing results a quick routine. | Rigor and discipline in your review flow. |
| #3: Into the Pipeline | Visual checks run automatically on every change. | Automated testing that exercises regular review discipline. |
| #4: Scale and Measure | Expand coverage and confirm the suite is healthy. | A coverage map, a health-check baseline, and a plan for what comes next. |
Week 1: Your First Baselines
The first week should be getting familiar with and setting initial configuration of Applitools Eyes.
Weekly Goal: Get stable, trustworthy baselines on one key flow.
Activities:
-
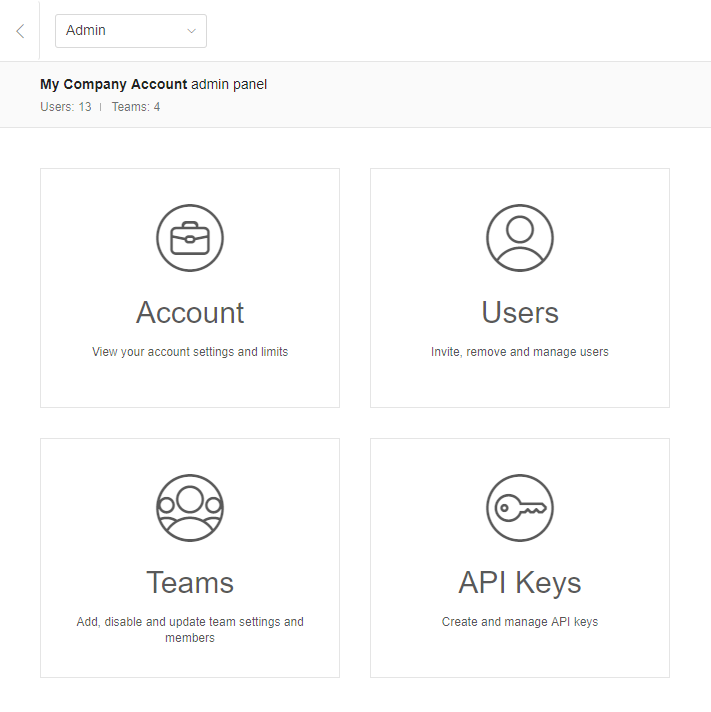
Set up your team: users, teams, and API keys.
-
Determine how API keys will be stored and retrieved.
- Environment variables, secrets management tool, or CI pipeline secrets are all options.
-
Pick one suite. Use the "Choose Where to Add Visual Assertions" criteria from Closing the Visual Gap as a rubric for determining the best focus for your visual tests.
-
Add visual assertions to the test suite.
-
Run the suite 3 times without changing anything. Any differences that appear are noise to fix before you go further.
Checkpoint: One batch, with baselines that pass on repeat runs.
Week 2: Learning to Review
Organizing how your team will handle reviews and who is responsible for approvals is crucial in developing a repeatable process around visual testing.
Weekly Goal: Make reviewing results a quick routine.
Activities:
-
Familiarize yourself with the review flow: Unresolved → Accept/Reject.
-
Use grouping and batch-level accept/reject. See batching and grouping.
-
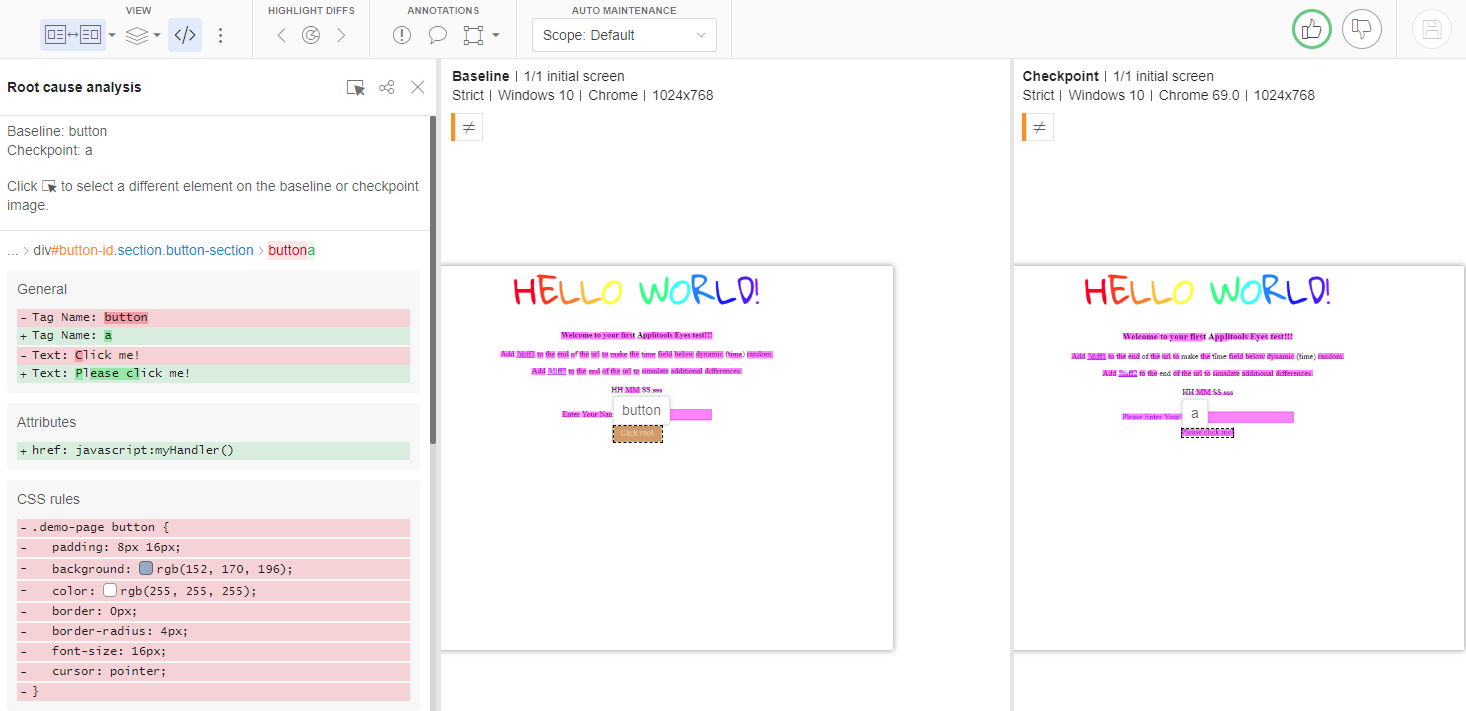
Use Root Cause Analysis to tie a visual difference back to the DOM change behind it.
-
Handle noisy areas: stay on Dynamic, add Layout or Ignore Colors regions where needed, and use Ignore regions only as a last resort (Handle Dynamic Content).
-
Decide who reviews results, and how often.
- An early suggestion is to review per-PR. When a PR is filed, once the CI pipeline is in place, it should become second nature to review as part of the PR process.
- A review person or group is critical to ensure test results are approved and tested or rejected. Lots of unsolved diffs become noise which can lead to ignored results.
Checkpoint: You've reviewed a real difference from start to finish, and someone (or ideally multiple people) on the team clearly owns reviews.
Week 3: Into the Pipeline
CI pipelines can automate runs, especially when using a typical branching SDLC strategy. Builds can be executed as part of the PR process, and with the process set in Week 2, can remove a lot of the friction manual testing would previously introduce.
Weekly Goal: Visual checks run automatically on every change.
Activities:
-
Create a CI pipeline that references your codebase (including your newly created Eyes tests).
-
Run your Eyes test suite in CI and pass in the API key as a secret.
-
Set up batching for CI (batch ID and naming, so parallel jobs land in one batch).
-
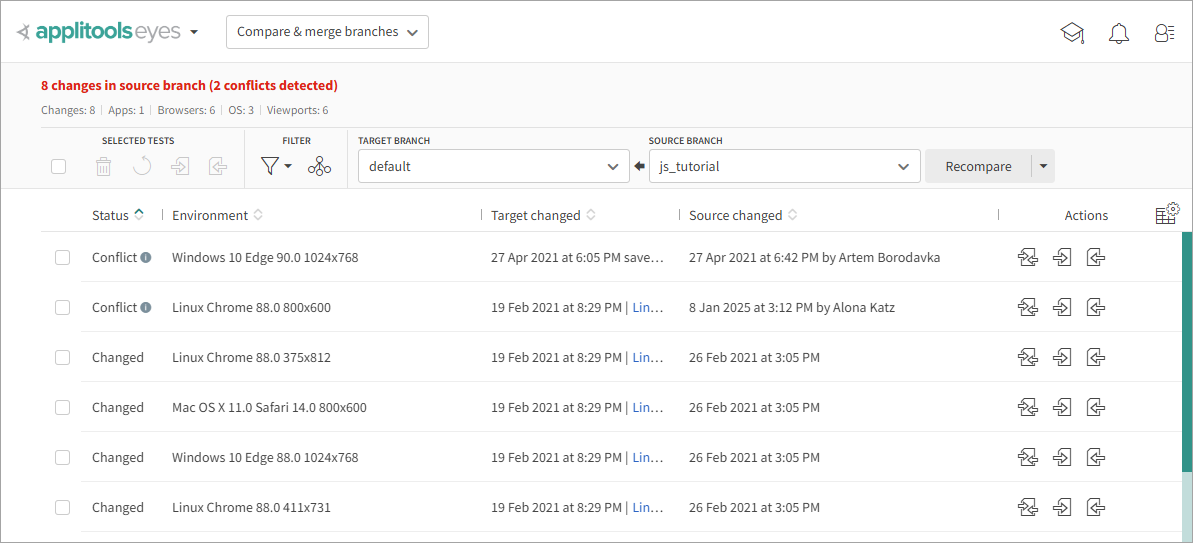
Use baseline branches (branch name, parent branch, and merging baselines).
-
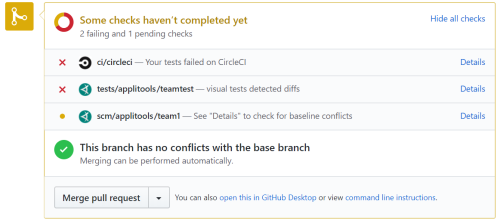
Turn on integrations:
- GitHub integration
- Slack, email, and Teams notifications
- Jira integration
-
Settle failTestsOnDiff behavior for CI.
Checkpoint: A PR shows an Eyes status, and the right person gets notified.
Week 4: Scale and Measure
Grow your tests and analyze metrics. Create a map of the tests you've created, as well as target for future tests. Then look to the future.
Weekly Goal: Expand coverage on purpose and confirm the suite is healthy.
Activities:
-
Roll out to the next 2–3 suites, using the same criteria as Week 1.
-
Add the Ultrafast Grid if your users are spread across browsers or devices (Expand & Grow).
-
Build a coverage map:
- Catalog the tests that you should expand to as well as the tests already covered
- As new functional tests are added, earmark visual tests to complement the components users see
-
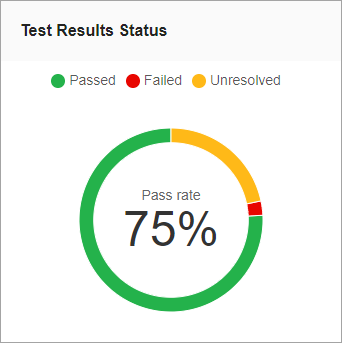
Run a Day-30 health check, looking at the following metrics. You may need assistance enabling the Usage view in the Admin panel so your admins can review some of this data. Your Technical Account Manager can also pull this data for you, as well as assist with resolving these issues.
- Pass rate trend
- Tests stuck at 100% pass that never catch anything
- Low pass rates
- SDK version up to date
- No env or URLs in test names
- Very tall full-page captures
- Unused or stale tests
-
Set goals for Day 60 and Day 90.
- Setting a targeted percentage of your overall tests to add visual testing to is a useful goal.
- You can work with your Applitools Technical Account Manager to develop a Joint Success Plan to build out the next steps.
Checkpoint: A coverage map, a health-check baseline, and a plan for what comes next.
Do and Don't
| Do ✅ | Don't 🚫 |
|---|---|
| Start small and stabilize first | Instrument every suite on day one |
| Assign a review owner | Leave Unresolved results to pile up |
| Use branch baseline | Accept feature-branch changes onto main |
Wrapping Up
Congratulations! You've got the beginnings of operational rigor and process for your testing suite. Continuing to add tests and maintain your baselines is key, but once you have these systems in place you'll be catching visual bugs before they get to customers' eyes.
Next: Browse more best practices
Additionally, you can work with your Technical Account Manager to cover these basics together and ensure you're on the right track for mastering Applitools for your visual testing.