Applitools JIRA Integration
Eyes allows you to annotate any step in the test with one or more issues, as described in this article. Eyes also allows you to associate such an issue with a Jira issue. You can either create the Jira issue from within Eyes or you can link an existing Jira issue to an Eyes issue. Linking Eyes and Jira issues is described in the article Using the Eyes/Jira integration.
This article describes how to enable and configure the integration of Jira with Eyes. This must be done by a user with Team admin rights. Once the required setup is performed, you will see the option to create and link to a Jira issue in the Test editor or Step editor Create issue dialog.
To set up Jira integration with Eyes, you need to provide three pieces of information:
- The URL of the Jira Server
- The ID of your Jira project
- The ID of the Jira issue type you want Eyes to report
If you do not have these values, then you need to obtain them from the Atlassian site. You might find this link in the Atlassian site helpful: How to get project id from the Jira User Interface.
Setting up the Jira/Eyes Integration
-
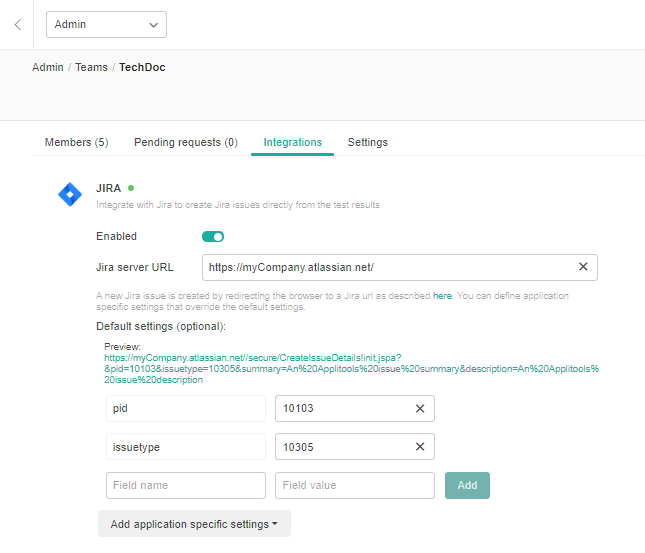
Load the Admin page using the page selector. Select the Teams panel and click the row for the team you want to configure. On the team configuration page, click on the Integrations tab and then click on the Jira integration icon.
-
Enter the Jira server URL, the pid (project ID), and the issue type id into the appropriate fields.
-
Optionally, you can request that Eyes includes other Jira information when creating the Jira issue. Click in the Field name box and select the Jira attribute you want to add, then in the Field value box enter the value you want to associate with that attribute.
-
A new Field name attribute appears, and you can add additional attributes by repeating the step above.
-
You can also add pid and issue type information on a per application basis by clicking on Add application specific settings and selecting an application from the displayed list. The Test Manager will open a new set of fields, as described above, and you can enter the project ID, issue type, and other Jira attributes for that application. Repeat this step for each application to which you want to give specific Jira values.
Finding Your Project ID and Issue Type ID
There are three ways to obtain the PID (project ID) and IssueType ID that the integration requires. Which one you use depends on the access you have in Jira.
Method 1: REST API
This is the fastest option and returns both IDs in a single call. Send a GET request to /rest/api/3/project/{projectIdOrKey}, using either the project key (for example PROJ) or its ID:
curl --request GET \
  --url 'https://<your-site>.atlassian.net/rest/api/3/project/{projectIdOrKey}' \
  --user 'your-email@example.com:<api_token>' \
  --header 'Accept: application/json'
In the JSON response, the top-level id field is your PID. The response also includes an issueTypes array, where each entry has an id (the IssueType ID) and a name such as Bug, Task, or Epic, so you can match the ID to the type you want.
You need a Jira API token for the --user field. Generate one from your Atlassian account settings under Security > API tokens.
Method 2: Browser
If you do not have API access or admin rights, you can read both IDs from the page source of the Create Issue screen.
To find the IDs from the Create Issue screen:
- Go to
https://<your-site>.atlassian.net/secure/CreateIssue.jspa. - Right-click the page and choose Inspect to open your browser's developer tools.
- Find the element with id
#project-optionsand expand the Recent projects JSON data. Locate your project's name and note itsvalue— this is the PID. - Find the element with id
#issuetype-optionsand expand thedata-suggestionsJSON data. Locate the issue type you want and note itsvalue— this is the IssueType ID.
With both values, you can also build a pre-filled create-issue link:
https://<your-site>.atlassian.net/secure/CreateIssue.jspa?pid=<PROJECT_ID>&issuetype=<ISSUE_TYPE_ID>
Method 3: Admin UI
This method requires Jira admin rights.
To find the IDs from the Jira admin UI:
- Go to Settings > Issues > Issue Types.
- Click the
⋯menu next to the issue type you want, then click Edit. The ID appears in the URL, in the form...EditIssueType!default.jspa?id=<ISSUE_TYPE_ID>. - For the project ID, go to Project Settings > Details within the project.
Linking Bug Regions to JIRA Issues
After creating a bug region on one of your test results, you can link this bug to an issue in JIRA.
-
Locate or create the bug region you're interested in Linking
-
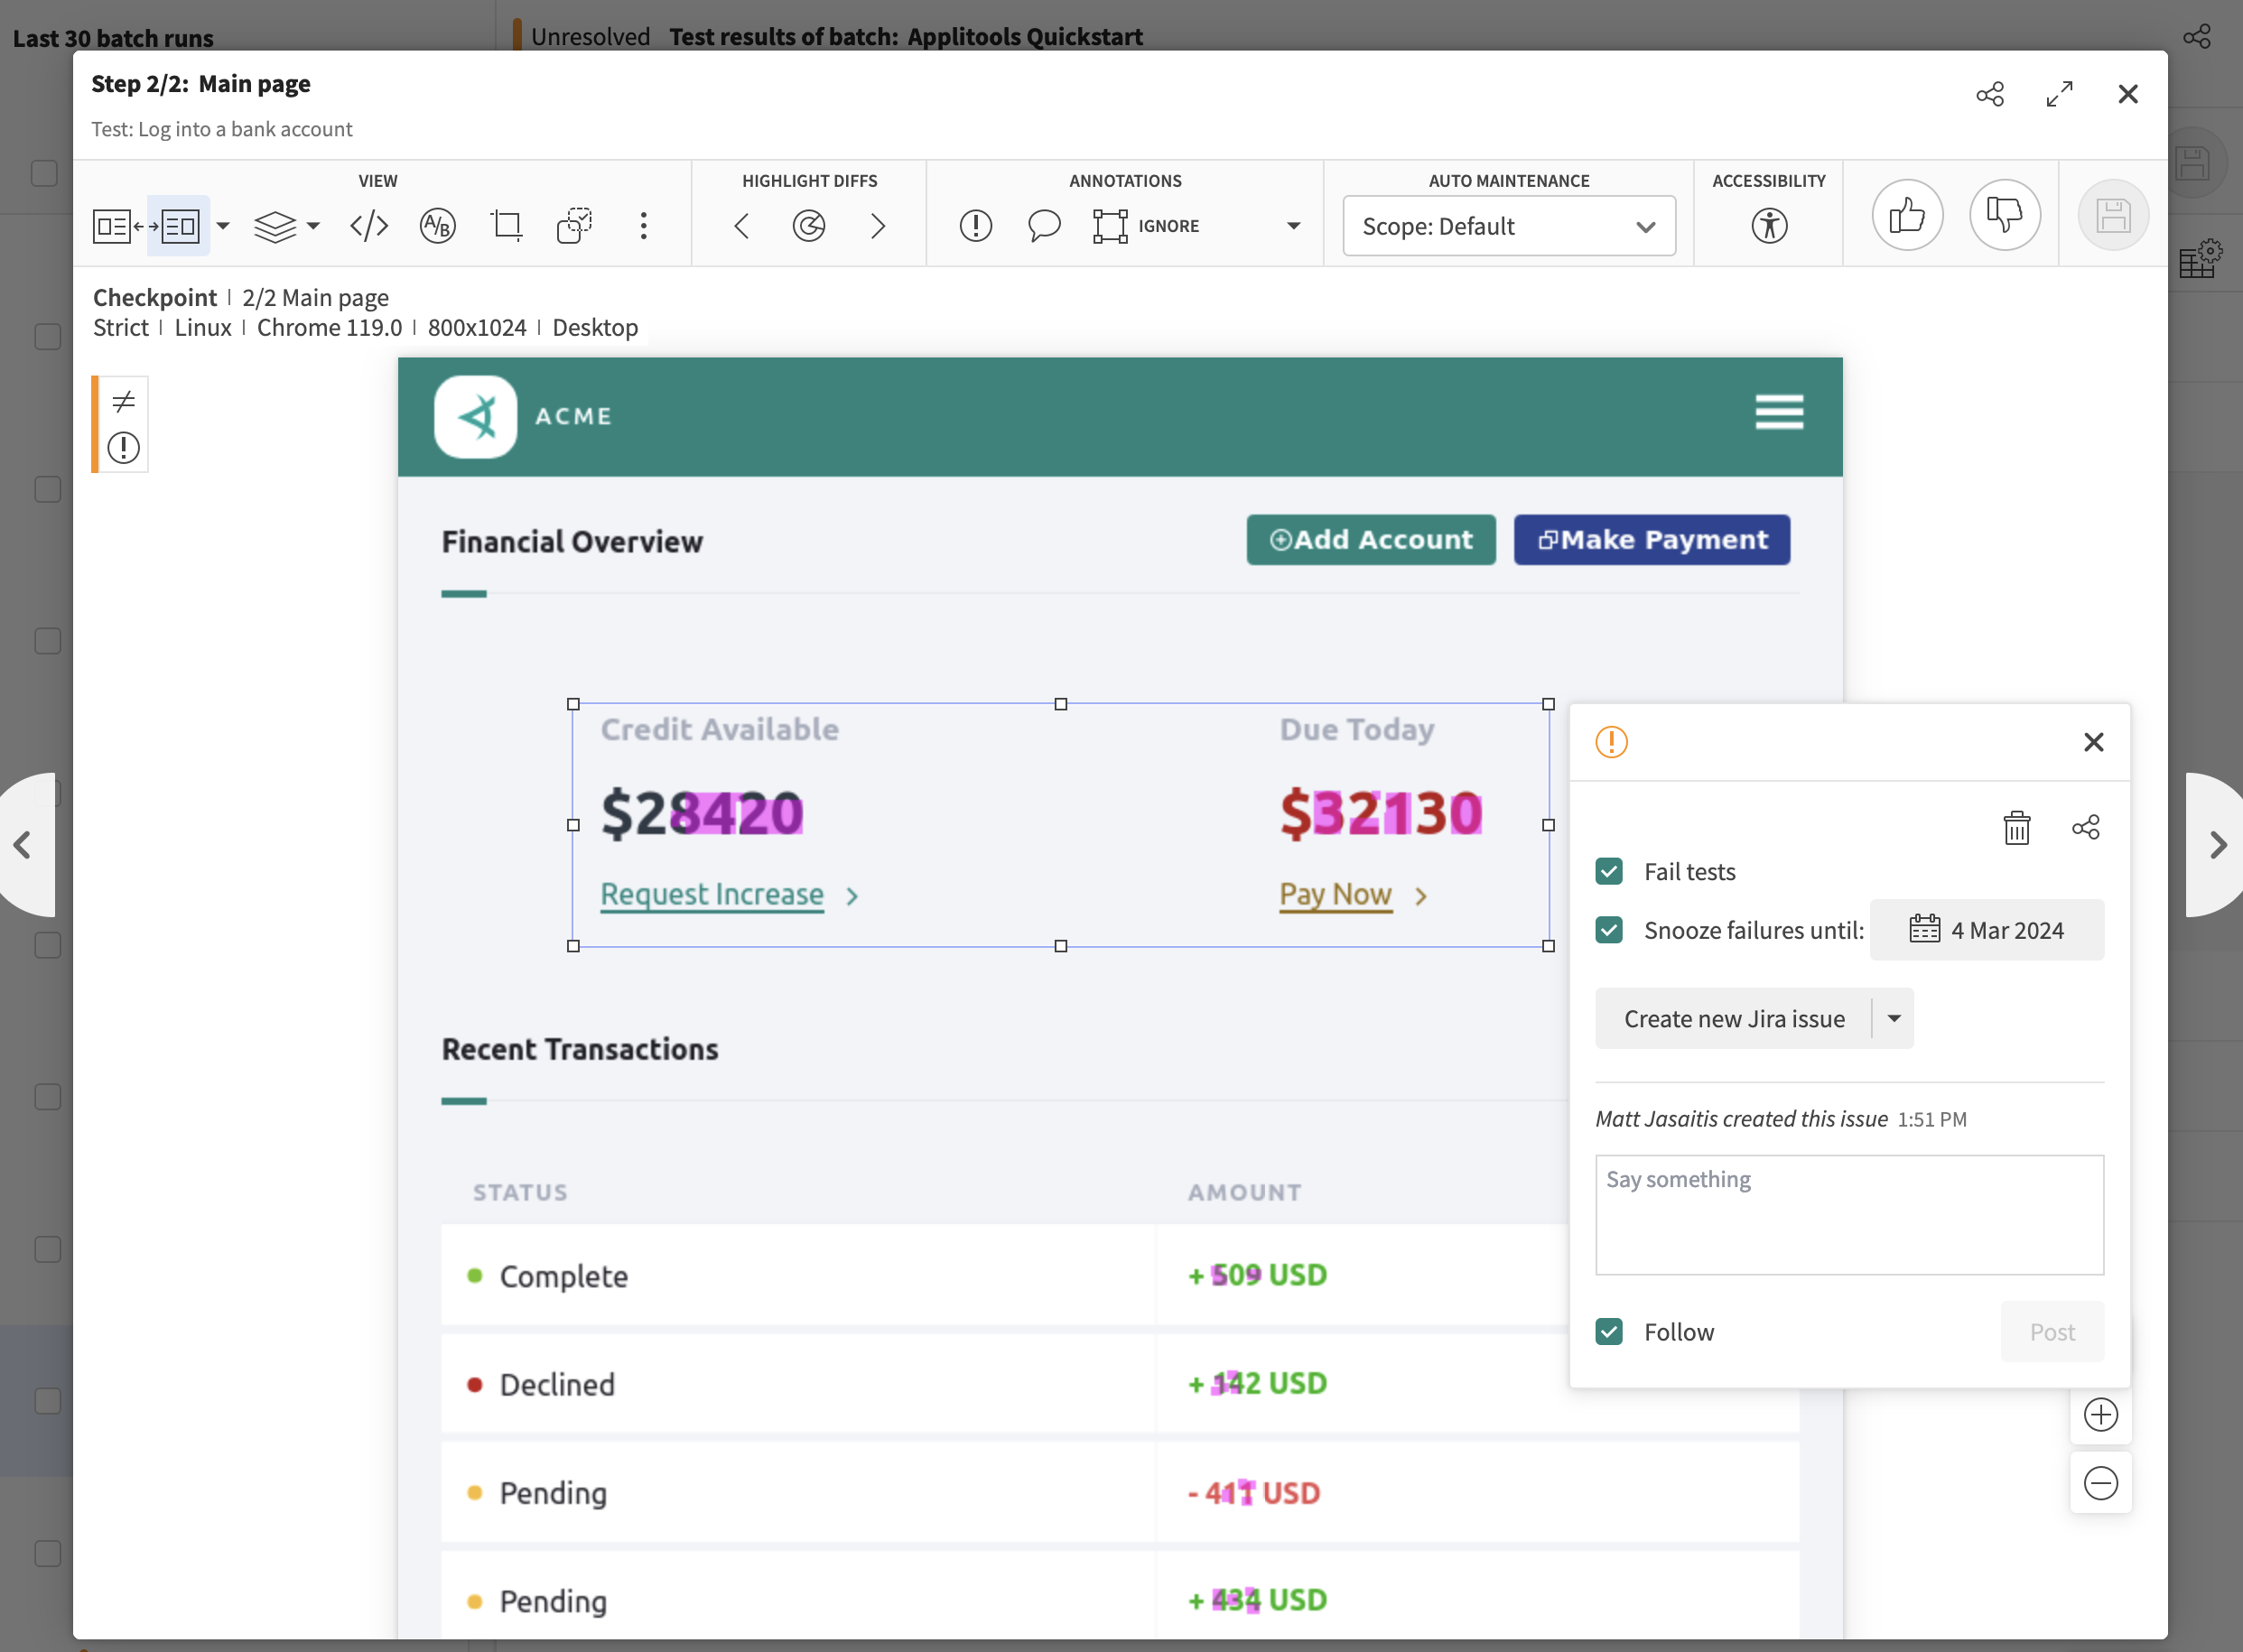
Click on the region and open the popup shown below
Creating a new JIRA issue
-
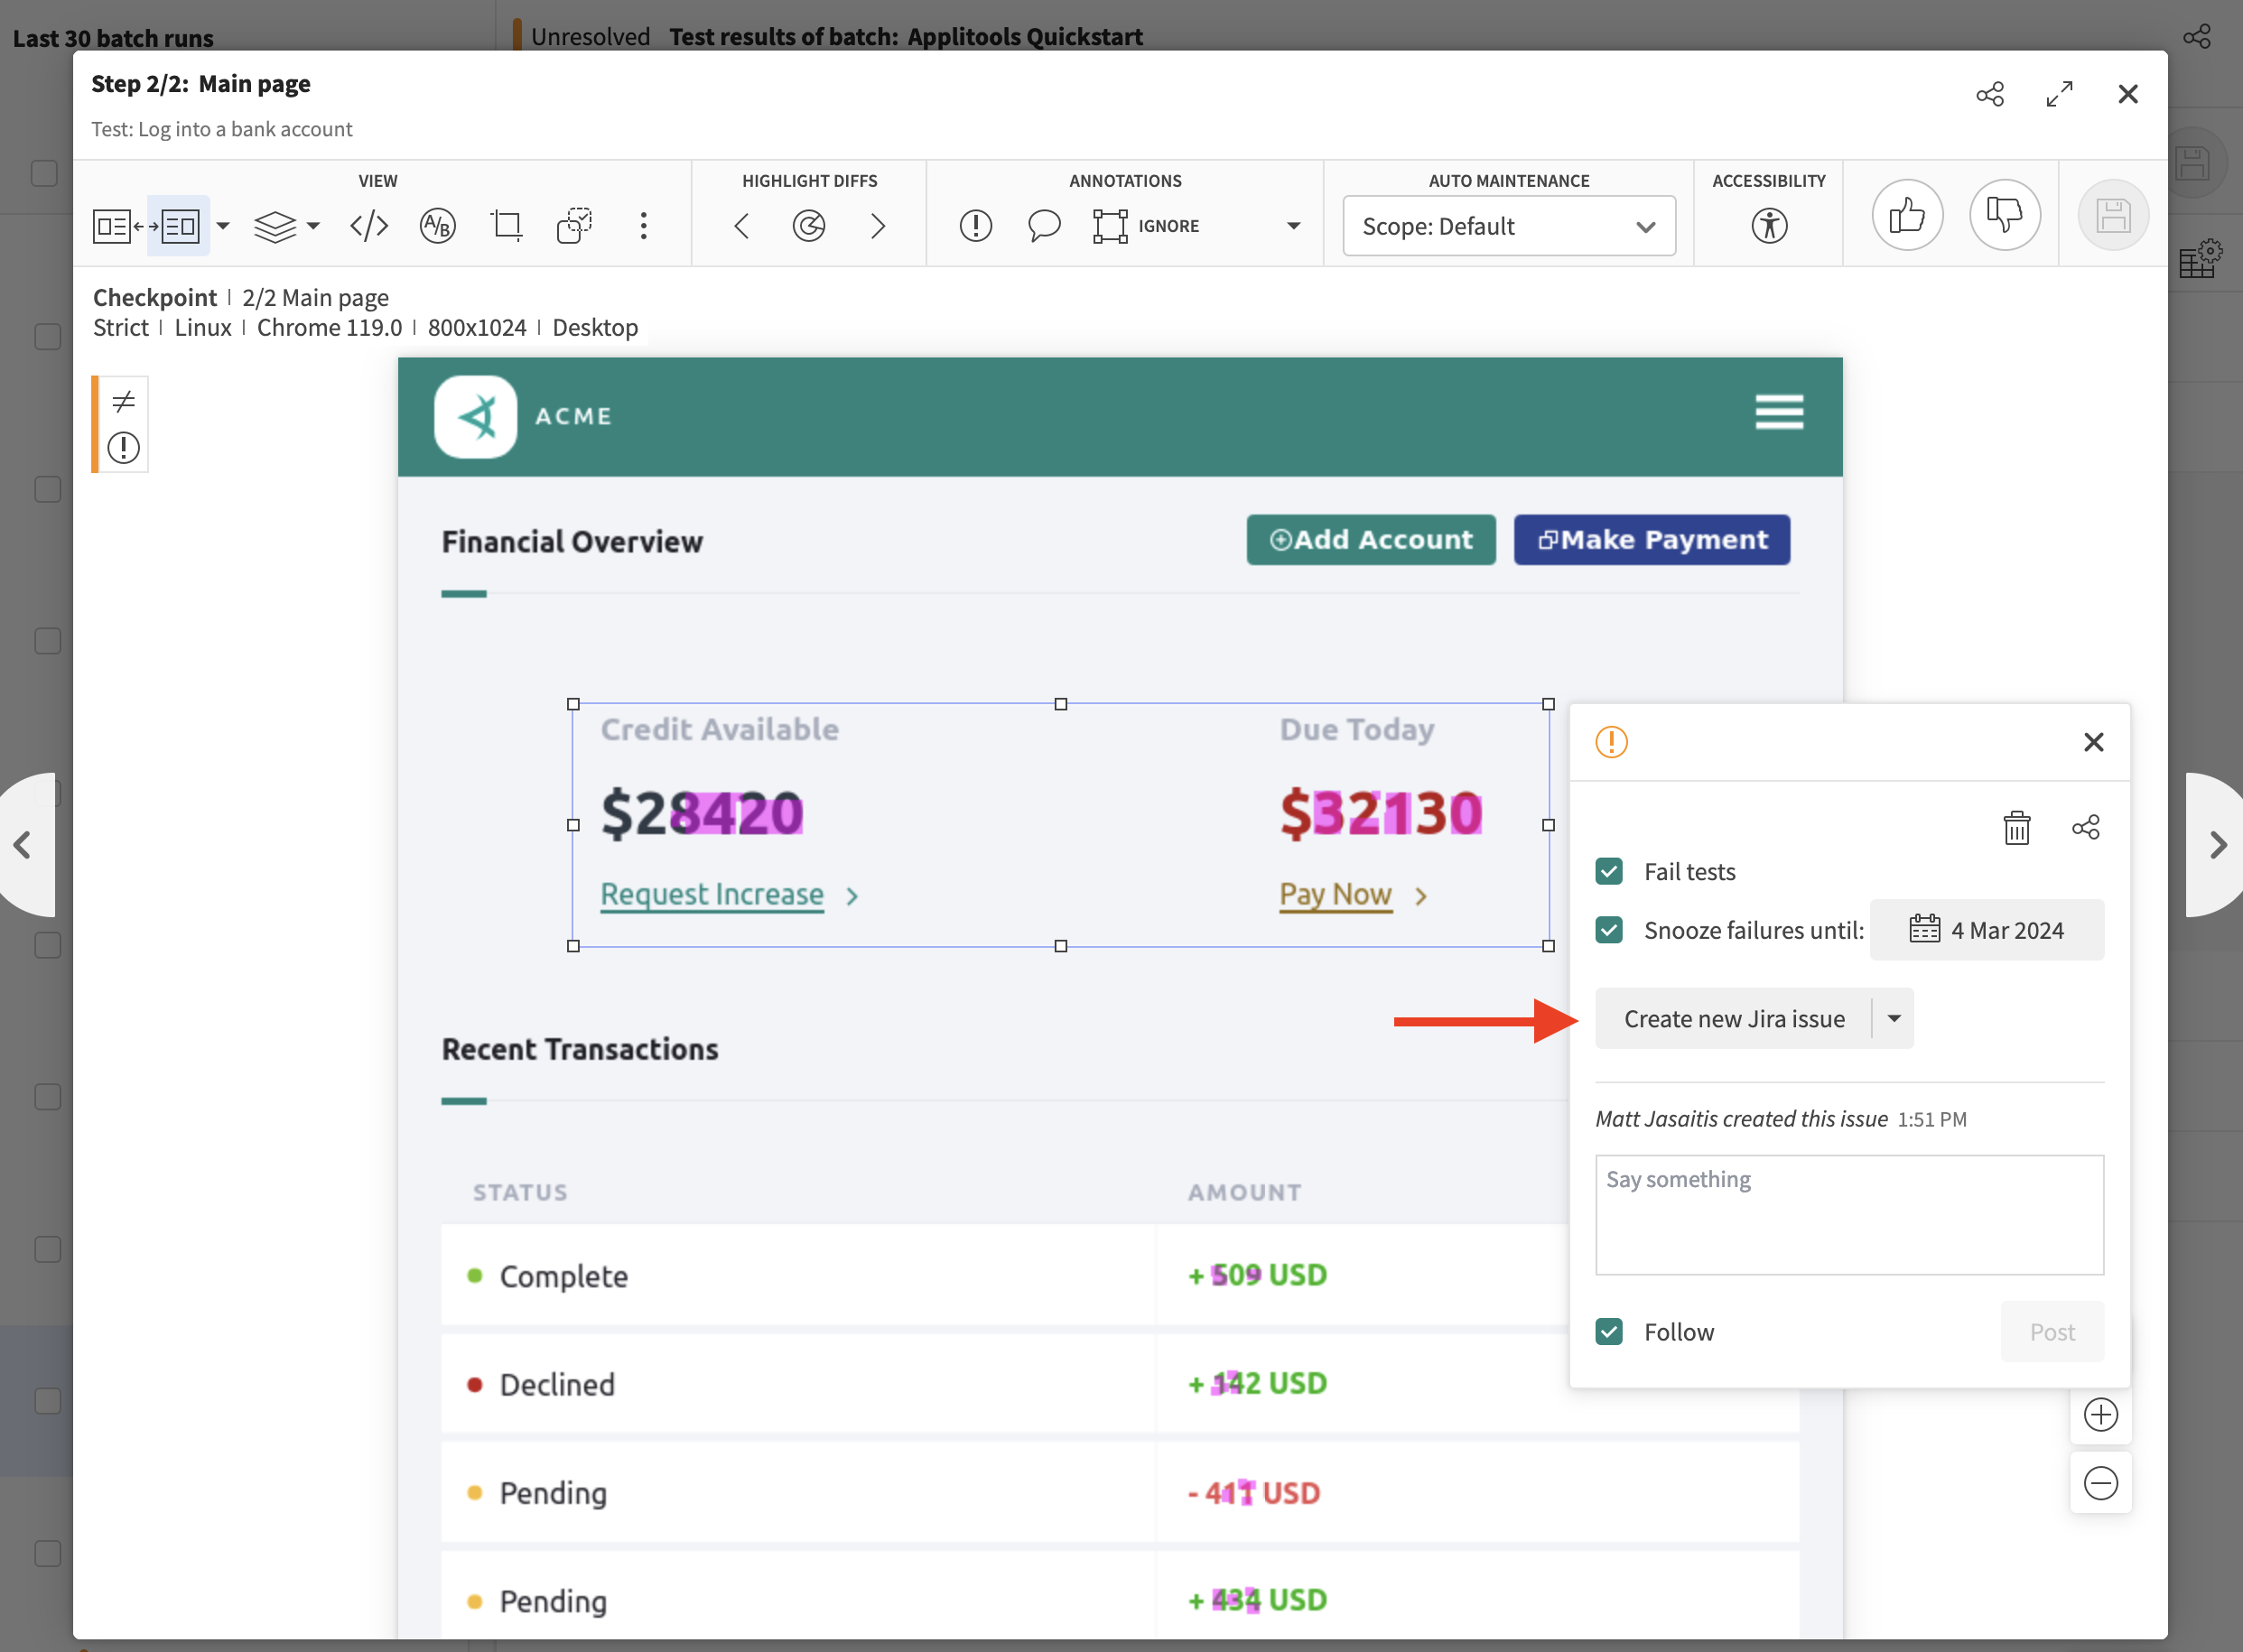
Click on the Create new Jira issue button
-
Fill in the details of the JIRA issue
-
Save the JIRA issue and grab the issue ID
-
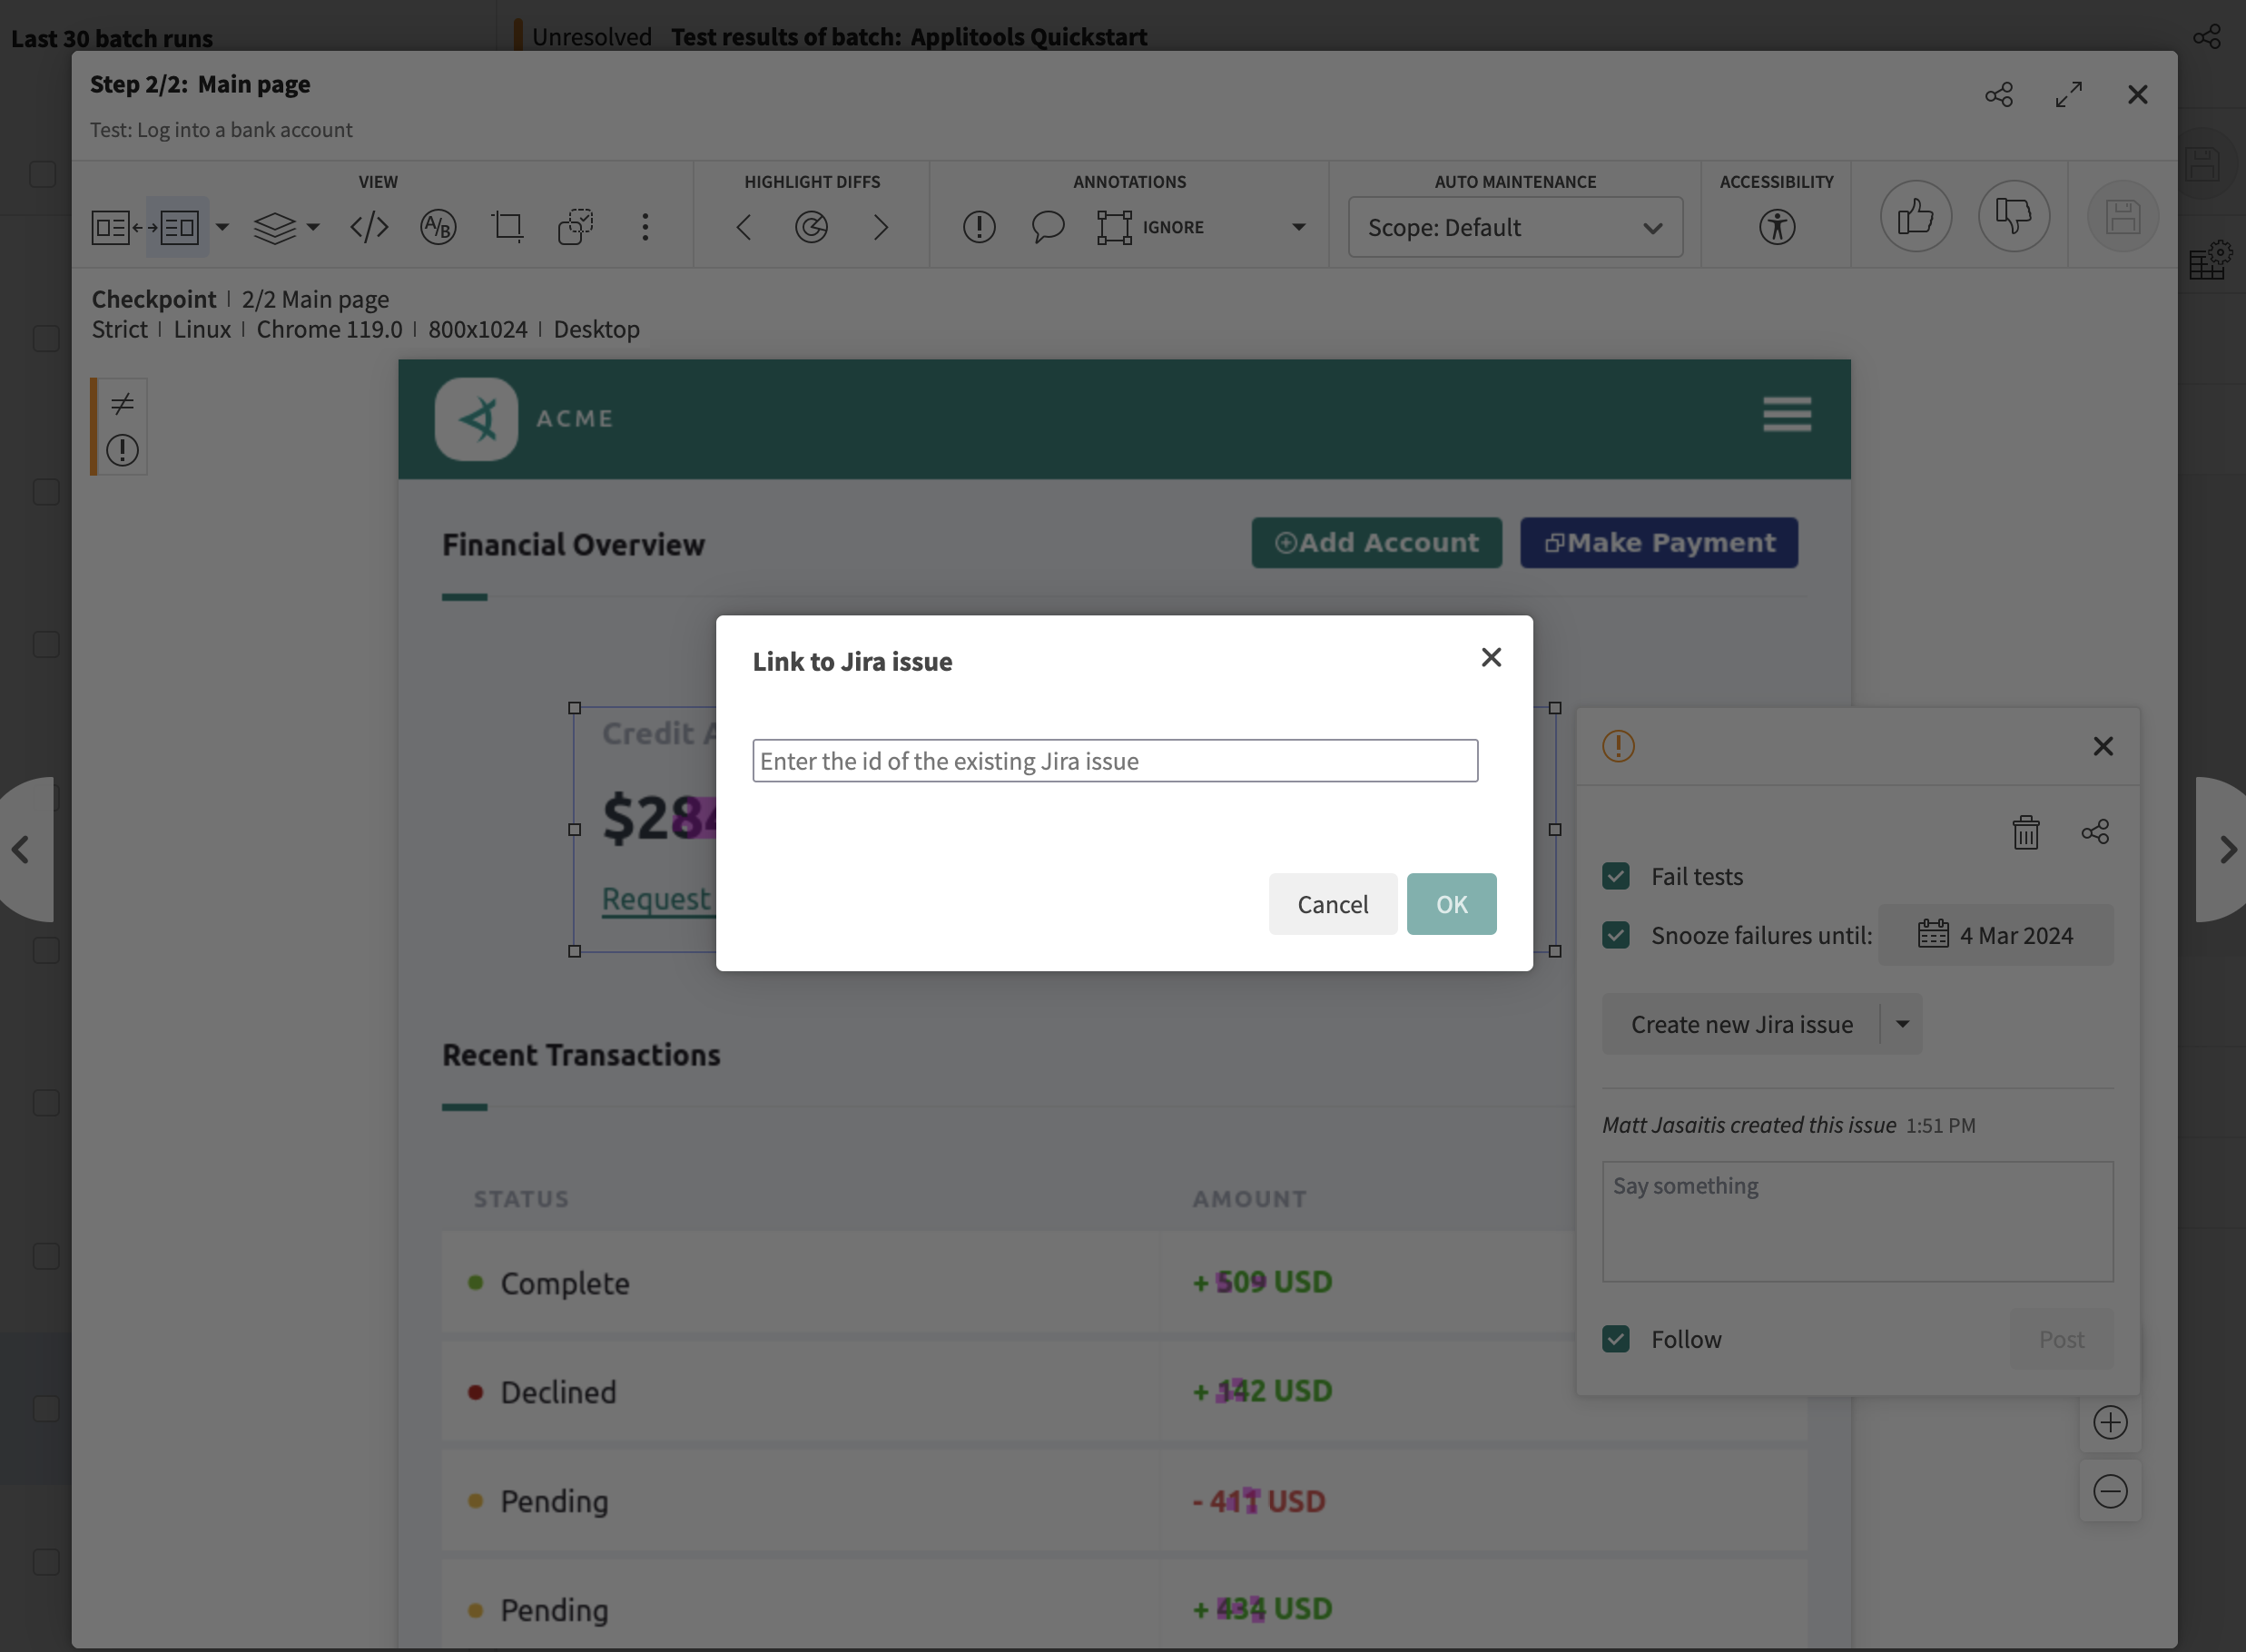
Paste the issue ID into the popup dialog and click ok
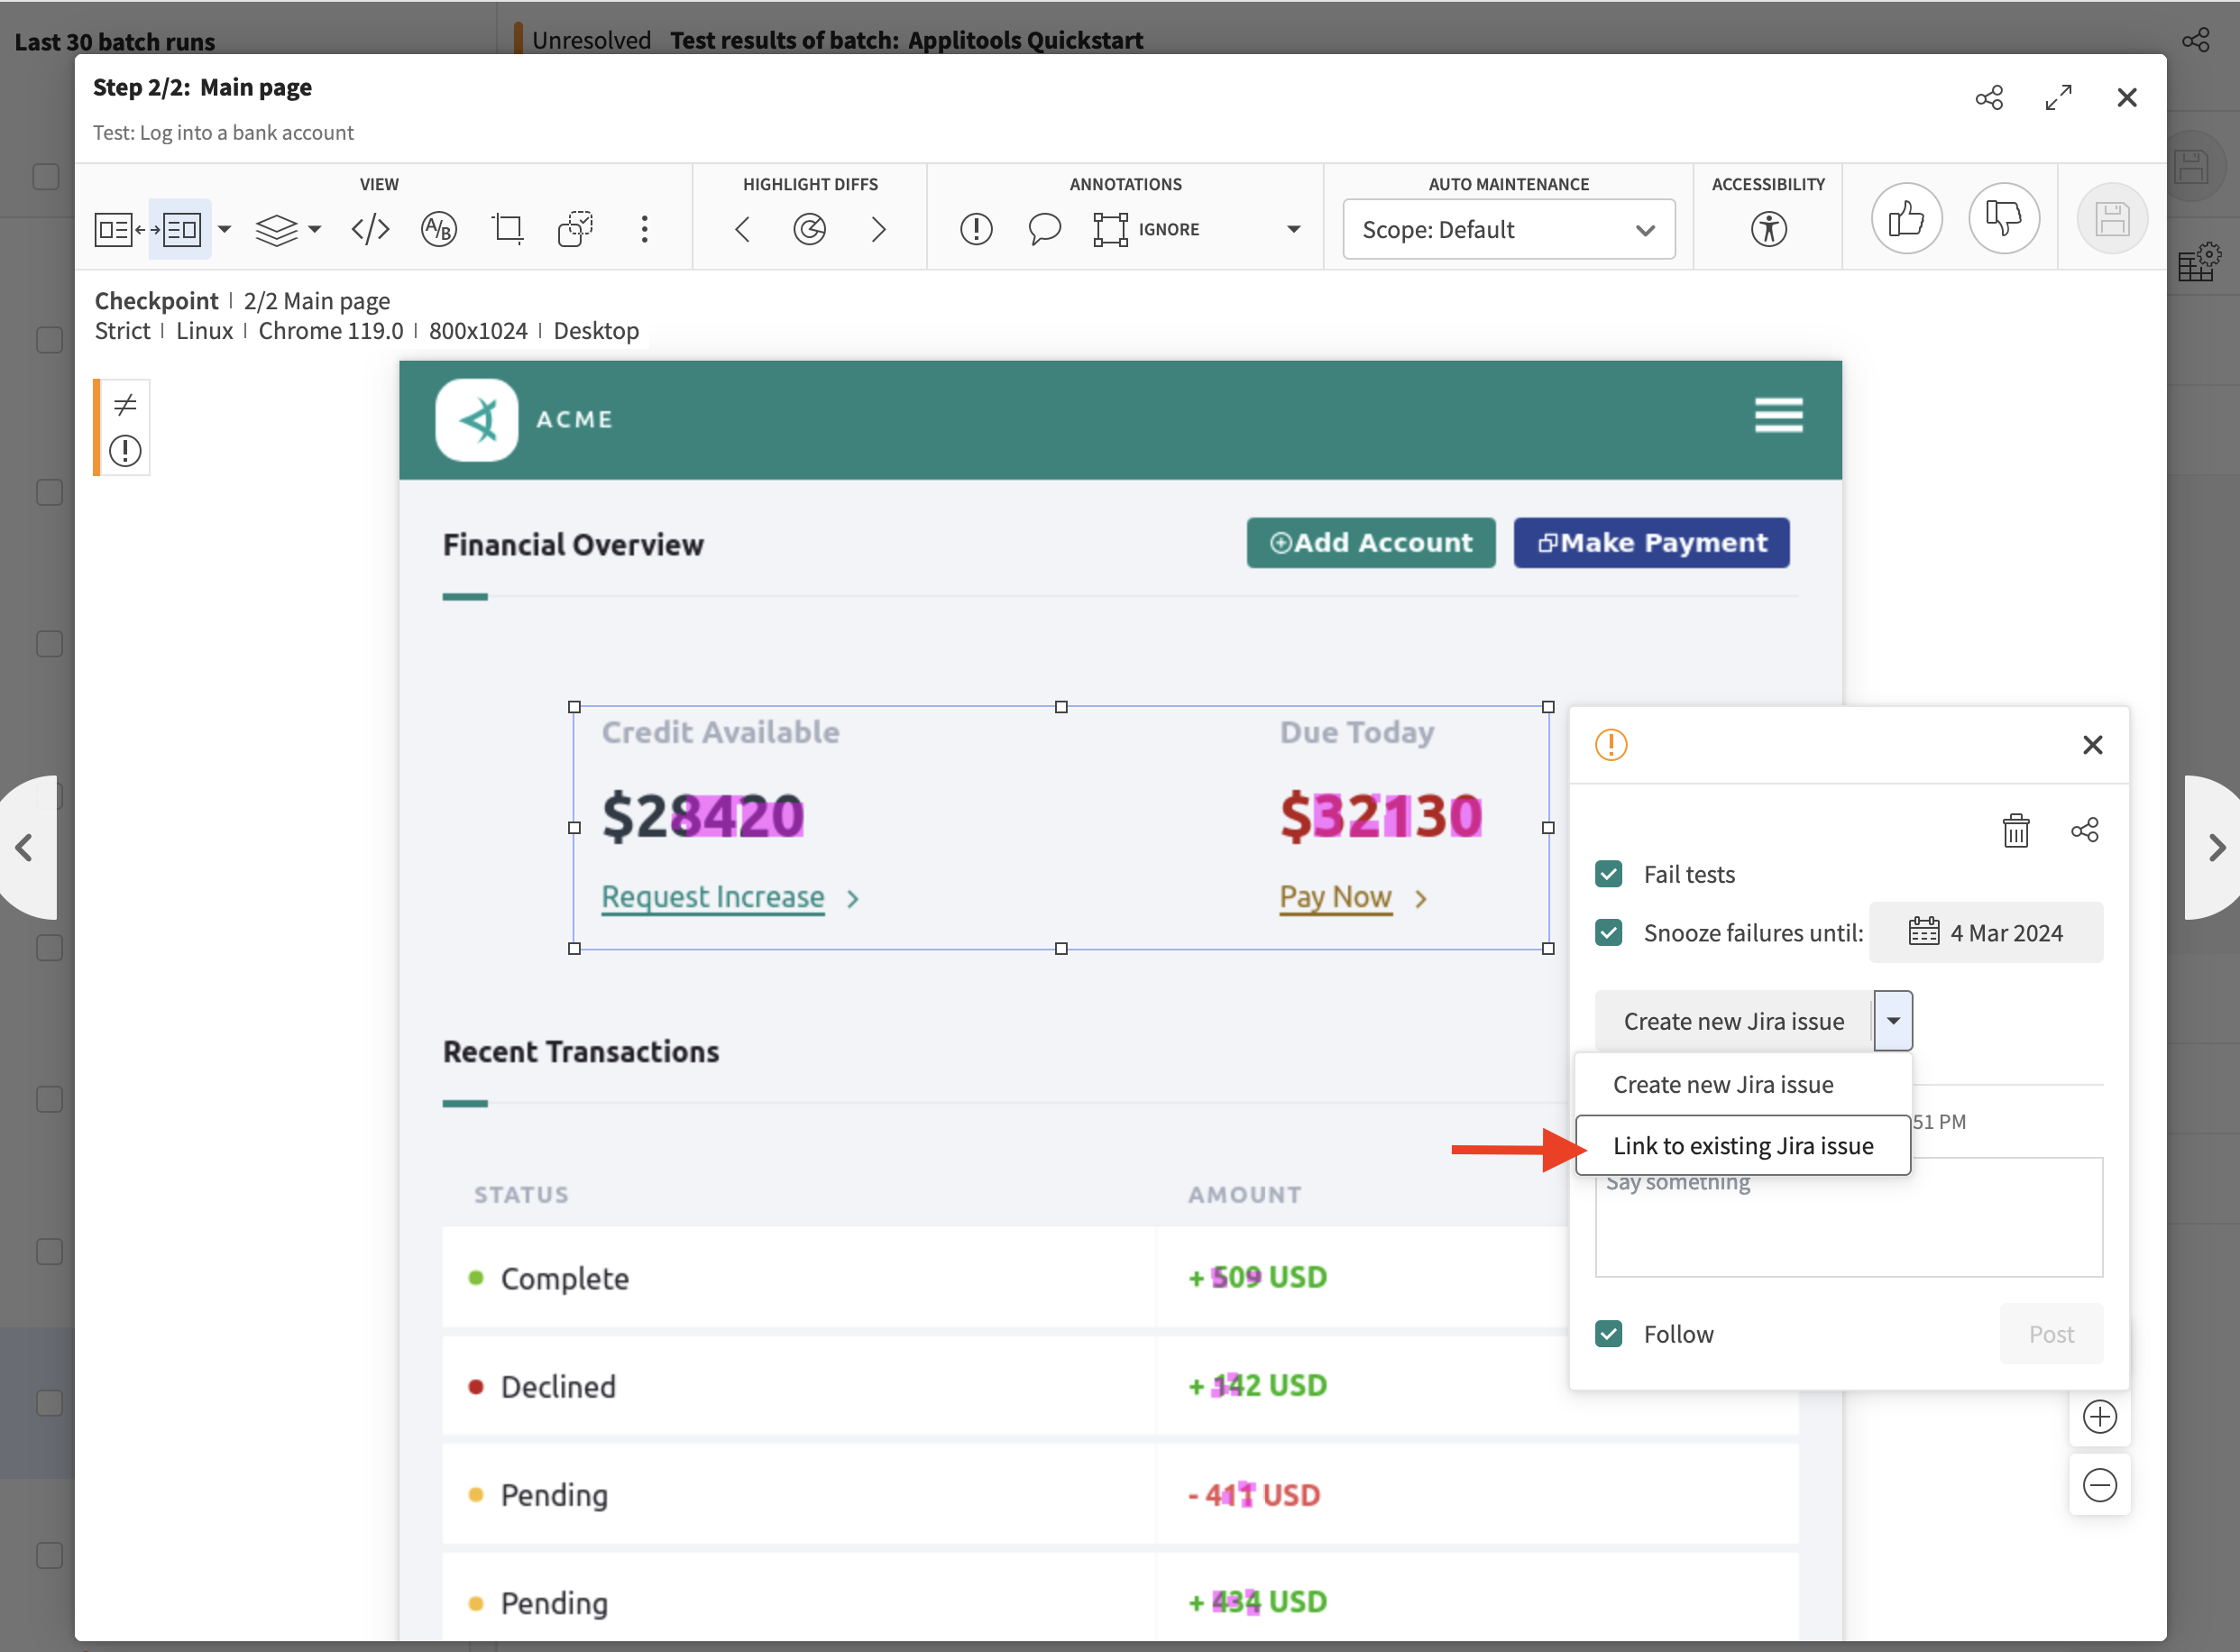
Link to an existing JIRA issue
-
Click the dropdown arrow and select Link to existing Jira issue
-
Paste the existing issue ID into the popup dialog and click ok
Unlinking a JIRA issue
To remove a link to a JIRA issue, click on the dropdown arrow and select Disconnect from Jira